The nanoVNA and MATLAB

The nanoVNA is a cheap but usable vector network analyser. It is good value and very useful for all sorts of RF design and radio ham activities.   I suggest you buy a nanoVNA from a reputable dealer as there are plenty of clones which don’t work as well as the original. The model I have has a tiny screen which I can read adequately but it isn’t as comfortable as reading a computer screen. The NanoVNA is a touchscreen device so you need to tap on tiny text to do anything. Again, this is possible but far from comfortable for those of us with ageing eyes. There’s also a bit of screen reflection.

nanoVNA

The nanoVNA can be driven from a PC using a program called nanoVNA-saver which is pretty good. Unfortunately it runs on Microsoft Windows and as I don’t have a PC running Microsoft Windows I have to run it in a VirtualBox VM on my Mac Mini. This works but is a bit clunky and to be honest my Mac mini is a bit long in the tooth and struggles to run virtualised Windows 10 at a reasonable speed.

There is a cross-platform solution based on Python which looks promising. It uses Homebrew on MacOS which clashes with MacPorts which I use. I tried to make it work under MacPorts but fell into the usual maze of incompatible library versions causing the make to fail. So I gave up as I want to play with electronics and not software building. [Update: Rudi, DL5FA kindly helped with this and it looks like the Python Virtual Environment will help when I’ve got the time to try again.]

MATLAB to the rescue! — alex_m has created some MATLAB scripts which allow you to interrogate and control the nanoVNA from MATLAB. Thanks Alex! So if you have MATLAB this may be useful. If you don’t you may be able to convert much of this to Octave but it does use the MATLAB RF Toolbox so you may end up doing a lot of work.  Alex’s scripts produce LogMag, Smith Chart and TDR Step Response graphs. 

Here’s a graph showing my 40m LPF characteristics made using Alex’s scripts.
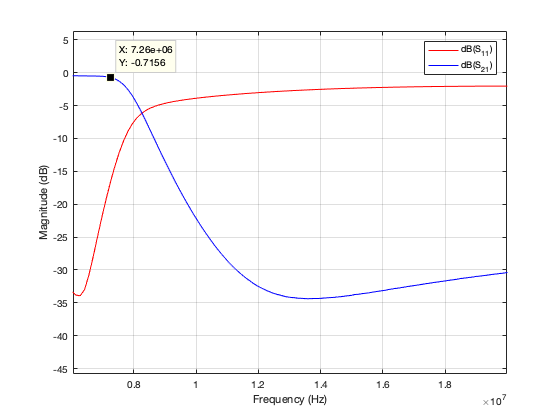
40m LPF LogMag

I’ve written a couple of scripts based on Alex’s work which I think makes using the nanoVNA easier. Both scripts need an edit to configure the serial link to the nanoVNA. You’ll need Alex’s code too.

The first script ajfCalibrate.m calibrates the nanoVNA for a particular sweep on the S11 port. You have to do this before every measurement that changes the sweep values, so you do it a lot. Here’s how it looks in the MATLAB console. The inputs are in italics.

>> ajfCalibrate
connect: Serial-/dev/tty.usbmodem4001
status: open
Sweep start (MHz)? 7
Sweep stop (MHz) ? 7.2
Calibrating...
press RETURN when S11 is open
press RETURN when S11 is shorted
press RETURN when S11 has 50 ohm load
Save [0-4]? 4
close
>>

The second script ajfVSWR.m produces a chart of VSWR against frequency. Most radio hams are happier with this than the LogMag chart preferred by RF designers. 

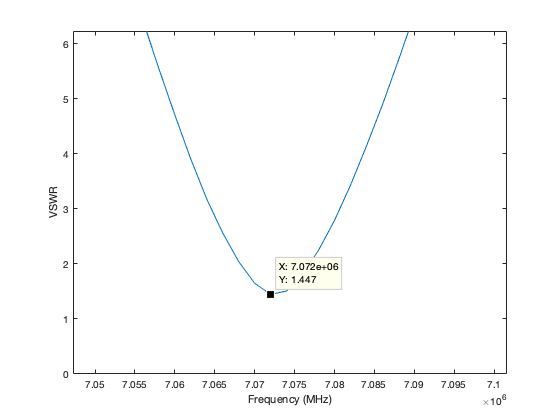
I used ajfVSWR to measure my small transmitting loop tuned to the 40m FT8 frequency. As expected it shows the narrow bandwidth in low VSWR that is the drawback of small transmitting loops. 
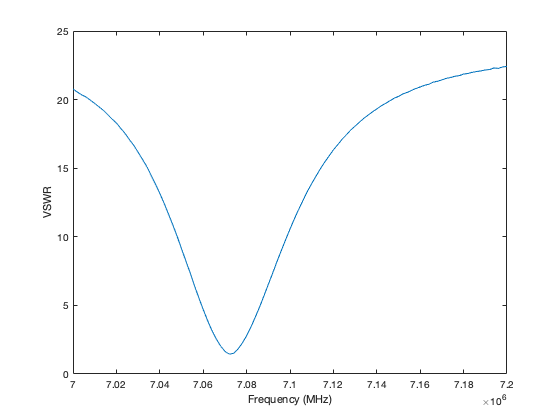
40m FT8 VSWR

The graph can be zoomed in MATLAB and have data cursors added to show more details.
40m FT8 VSWR 2

The VSWR could be lower. I think I left a metal step-ladder in the attic which is affecting the loop.

ajf? My initials.
50 Hz strobe

Some of my friends were in a band ’The Valves’ in the late 70s and more recently they have been playing the occasional (and excellent) gig here in Edinburgh. This year they brought out their first album — on vinyl. It’s called ‘Better Late …’. You can find all about them on Facebook: search for ‘The Mighty Valves’. 

Now I was supposed to be getting copy of the album at mates’ rates. But that involved meeting one of them which is not possible during COVID lockdown here on Scotland. But to prepare for its eagerly awaited arrival I thought I’d better dust off my turntable. I had ripped all my albums to MP3 ages ago and rarely used it. I found that it only worked at 45 rpm. The cure was to spray switch cleaner at the 33/45 rpm switch which was hidden inside — the switch that you press was pressing a plastic piece at right angles to the actual switch. 

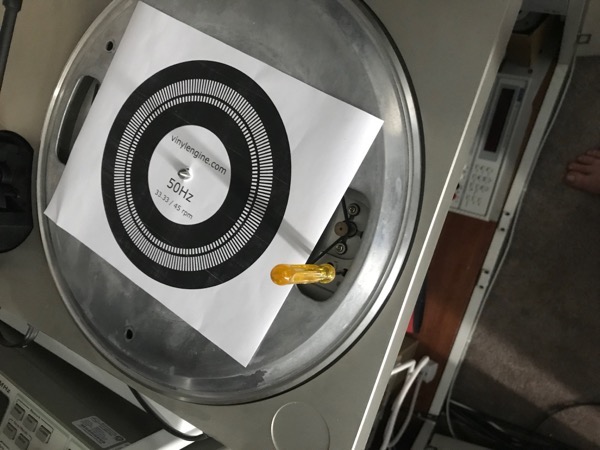
I though I might as well check it was still at the correct speed and remembered I had a strobe ‘disc’. It’s actually a piece of paper from vinylengine.com.

Stobe disc on turntable

The idea of the strobe disc is that the lines on the concentric circles will normally be blurred when the disc is spinning. When you shine a light strobing at 50 Hz the lines freeze and appear to be still if the disc is turning at 33 rpm. If the disc is spinning at some other speed the lines may look like they are spinning slowly backwards or forwards. I tried to take some videos of this working but they don’t show properly presumably due to the frame rate of the camera.

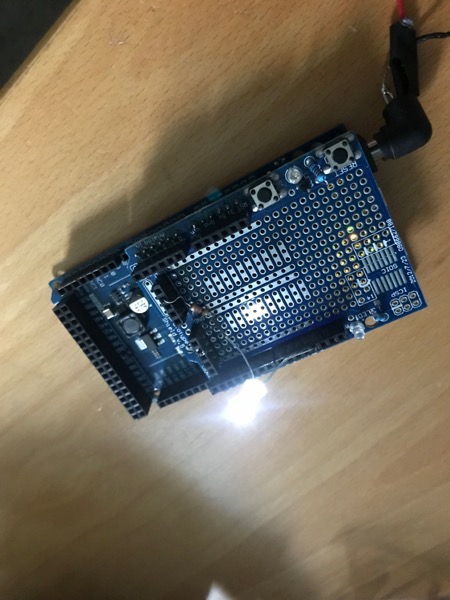
So how to get a 50 Hz light in these days without incandescent bulbs? Here’s a quick program for an Arduino which toggles a digital output at 50 Hz. A white LED and a 330 ohm resistor in series to ground is the entire circuit. About as simple as it gets.

/*
strobe LED at 50 Hz
*/
int ledPin = 12;

// the setup function runs once when you press reset or power the board
void setup() {
pinMode(ledPin, OUTPUT);
}

// the loop function runs over and over again forever
void loop() {
int delayms = 20/2; // 50 Hz has a period of 1/50 seconds = 20 ms
delay(delayms);
digitalWrite(ledPin, HIGH);
delay(delayms);
digitalWrite(ledPin, LOW);
}

I compiled this for an Arduino DUE which I had to hand, though I imagine it would work fine on an UNO. The ledPin value may need changed though. I compiled it using Arduino-cli with this incantation:

arduino-cli compile -b arduino:sam:arduino_due_x_dbg -p /dev/cu.usbmodem141101 -u

Arduino with shield

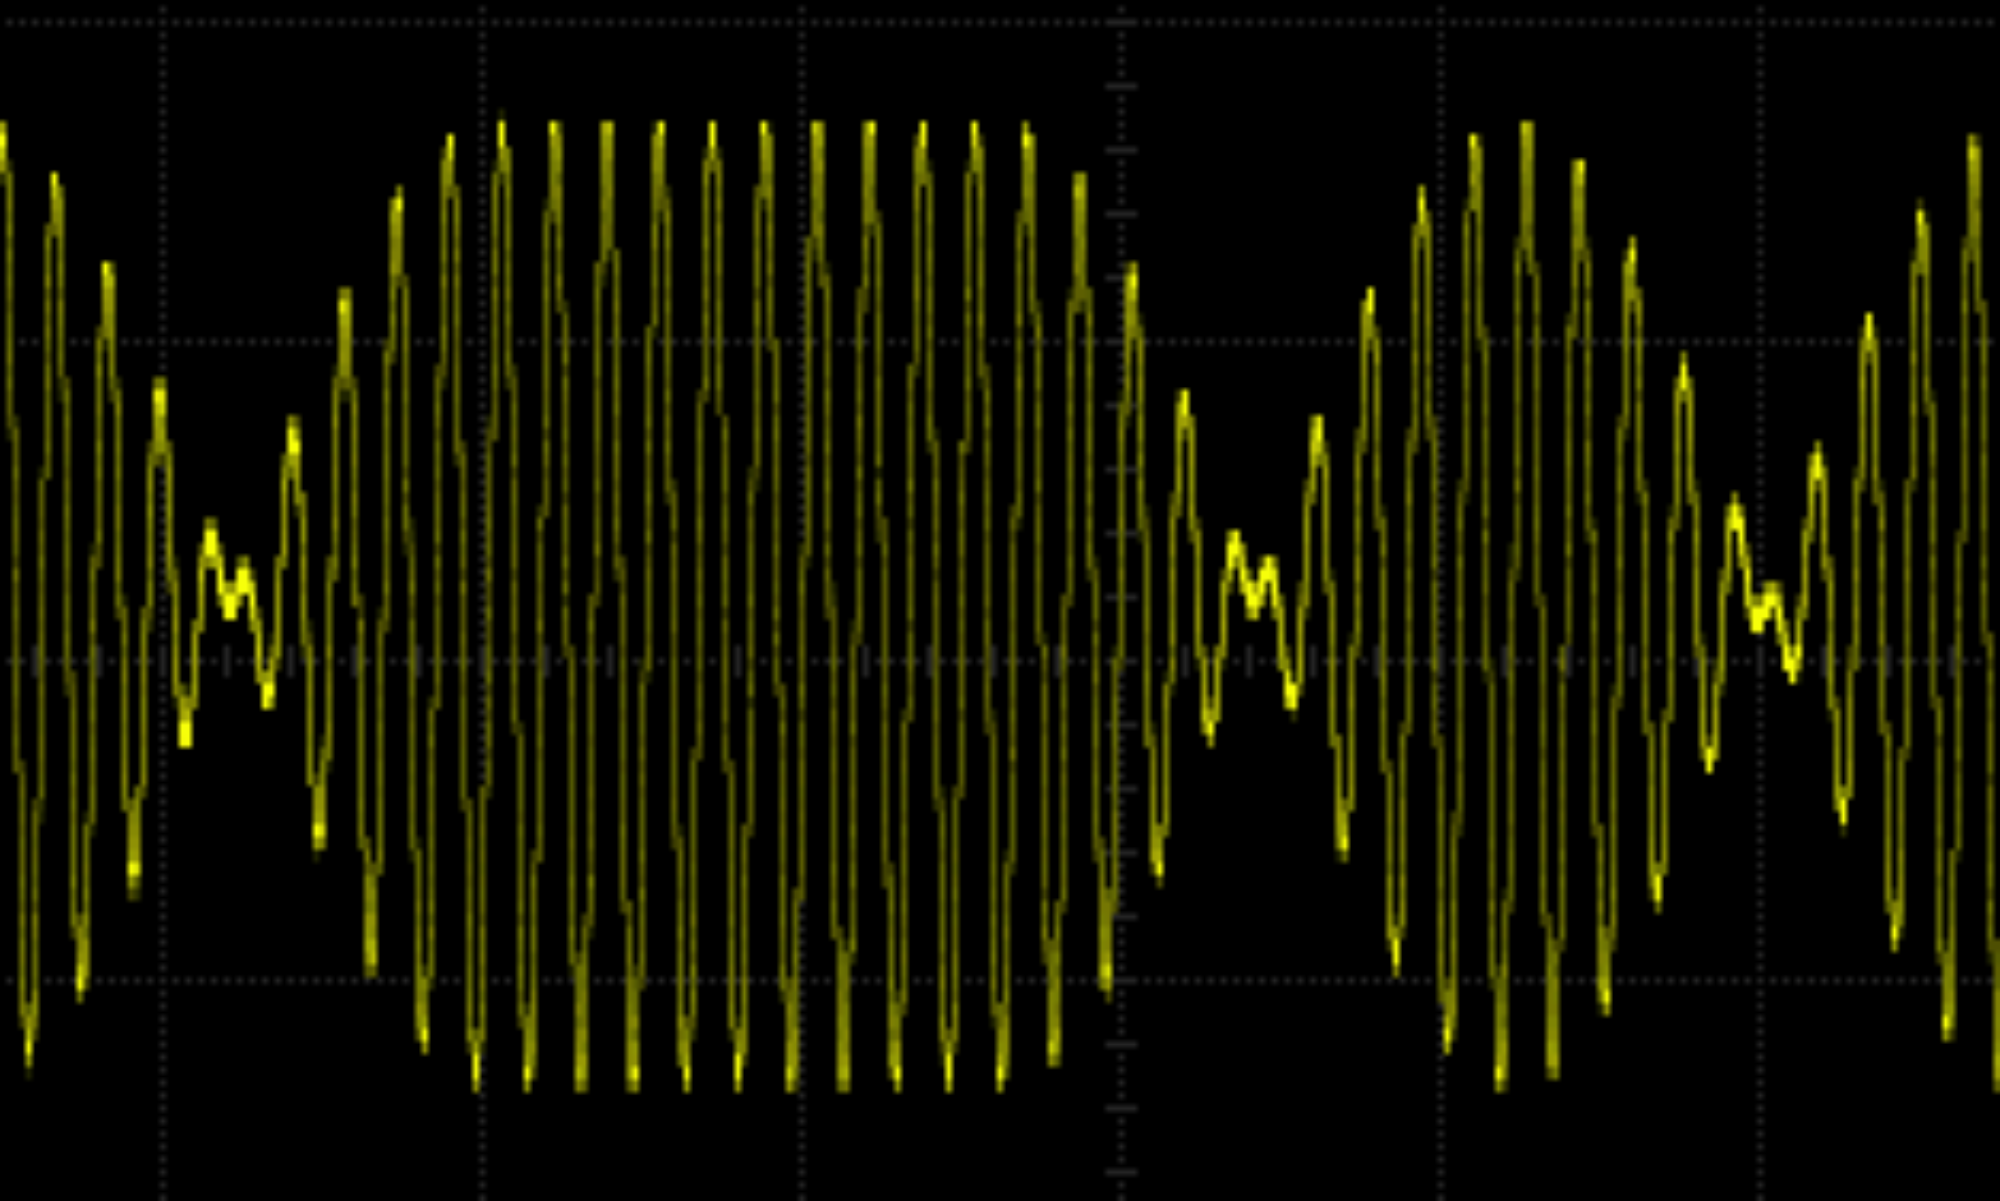
That meant I didn’t need to use the Arduino IDE and could use my code editor of choice (vim). Arduino-cli works well — thanks to the developers! BTW the Arduino IDE is fine, I’m just a terminal junkie. An oscilloscope confirmed the signal was at 50 Hz.

The picture shows me using a prototype shield on top of the Arduino. The shield is not necessary but the reset switch is easier to get at with the shield so I used it.

Did it work? Well… My turntable is a Pioneer PL-120 and the designers decided to make the speed control impossible to use while the turntable is spinning. See the yellow screwdriver which is at the speed control adjust screw in the picture of the strobe ‘disc’. So my fond dreams of shining the strobe at the disc and simultaneously adjusting the speed were dashed. I found it really difficult to do. Also it is summer here in Scotland and the weather has been good so the sun is in the sky nearly all of the time I am awake. So the LED could have been brighter to compete with the sun. It would work fine in winter or if I had better curtains.

In the end I put on a record and counted how long 10 revolutions took and did the arithmetic. Adjusted the speed (did I tell you the screwdriver is difficult to align with the speed control slot?) And repeated until good. So I didn’t actually use the strobe in the end.

A final test: ‘Oh! Wot A Dream’ by Kevin Ayers is billed as taking 2m 47s and I timed it at about 2m 46s. That’s good enough for rock and roll. Maybe someone with perfect pitch would howl in frustration — as am I waiting for the ‘Better Late…’ album.